


Installation Preparation
Proper preparation ensures a successful installation.
Before installing Keylanta Flexible Stone Wall Panels,
please review the following requirements.
Inspect the Panels
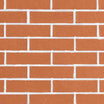
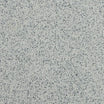
- Check panels for color, texture, and surface quality.
- Confirm quantity, dimensions, and style before cutting.
- Natural variations in color and texture are part of the authentic stone appearance.
- Mix panels from different packages for a balanced appearance.
Storage and Handling
- Store panels flat on a clean and stable surface.
- Keep panels protected before installation.
- Panels can be bent for columns, curves, and architectural features.
- Avoid sharp creases, 90° folding, or concentrated bending.
- Handle edges carefully to prevent damage.
Substrate Requirements
Before installation, make sure:
- Substrate is clean, dry, flat, and stable.
- Surface is free of dust, grease, and loose materials.
- Installation method matches the project requirements.
Basic Tools
 Tape Measure
 Level
Level
 Utility Knife
 Clean Cloth
Suitable Substrates
Keylanta panels can be installed on most properly prepared building surfaces.
Drywall /
Gypsum Board
Cement
Board
Concrete
Masonry /
Brick
Plaster
Painted
Walls
Existing
Tile
Wood /
Plywood
Always confirm the substrate condition and installation method before beginning installation.
For best results, complete a small test area before full installation.
Adhesive Selection
Choose the appropriate bonding material based on the installation location, substrate, and jobsite conditions.
Construction Adhesive
 Dot Application
 Vertical Bead Application
Polymer-Modified Thin-Set Mortar
- The substrate must be sound, flat, clean, dry, and free of dust, grease, loose paint, or contaminants.
- Wet areas must have a code-compliant waterproofing system before panel installation. Adhesive does not replace waterproofing.
- Do not use standard unmodified mortar or field-mixed cement-and-sand mortar.
- Always follow the adhesive manufacturer’s requirements for coverage, open time, working time, and cure time.
- Perform a small bond test before beginning the full installation.
Cutting & Shaping Guide
Keylanta Flexible Stone Wall Panels can be easily cut and shaped using common construction tools.
Before cutting, always confirm measurements and clearly mark the cutting line on the back side of the panel.
Straight Cuts With a Utility Knife
-
Measure and Mark
Measure the required size and mark the cutting line on the back side of the panel. -
Secure the Panel
Place the panel on a flat and stable work surface to prevent movement during cutting. -
Score the Cutting Line Multiple Times
Use a straight edge as a cutting guide and make multiple passes along the marked line with a utility knife. Do not force the blade through the panel in a single cut. -
Separate the Panel
Gently bend the panel along the cutting line to separate the material. -
Adjust the Edge
Check the cut edge and use the utility knife for minor adjustments if needed.

- Use a sharp blade for cleaner cuts.
- Multiple light passes provide better control and accuracy.
- Keep the cutting line straight to ensure proper installation alignment.
Straight Cuts With a Circular Saw
-
Measure and Mark
Measure the required dimension and mark the cutting line on the back side of the panel. -
Secure the Panel
Make sure the panel is properly supported and stable before cutting. -
Cut Along the Marked Line
Guide the circular saw slowly along the marked cutting line while maintaining a steady cutting direction. -
Check the Cut Edge
After cutting, inspect the edge and remove any dust or debris before installation.
- Keep the tool stable during cutting.
- Avoid excessive pressure to prevent surface damage.
- Confirm measurements before cutting to avoid unnecessary adjustments.

Curves and Custom Shapes
▶ Use a jigsaw or another appropriate cutting tool.
- Mark the required shape on the back of the panel.
- Confirm the measurements and installation position.
- Cut slowly along the marked line.
- Test-fit the panel in the installation area.
- Trim the edges as needed.

NEED INSTALLATION HELP?
Every project is unique. Our team is here to help you choose the right products and installation method for your project.